
We can’t believe it is already the end of July! This summer has just been cruising along. To tell you the truth, we are both excited for the summer to be over and for the fall semester to begin. First … Continue reading

We can’t believe it is already the end of July! This summer has just been cruising along. To tell you the truth, we are both excited for the summer to be over and for the fall semester to begin. First … Continue reading
Okay, so we really like cinnamony-sugary-sweet things. And by we, we mean Erica. So when we (actually we, not Erica-we) stumbled across an easy recipe to make homemade cinnamon sugar donuts (or doughnuts if you prefer), we knew we had to try them out! And when better than for our first Easter brunch together?
These came together so quickly and it’s actually pretty likely that you already have everything on hand that you need. And if not, you can buy a can of biscuits seriously anywhere (I’m positive the Rite Aid on our campus would have them). They would be great if you’re having friends over or if your parents are visiting for the weekend and you want to cook up something for the morning! If you want icing instead of the sugar, here is a yummy, but simple one!
Oh, and if anyone is in Pittsburgh this Saturday, stop by Pitt Ballet Club’s variety production featuring Alice in Wonderland at 1pm and 5pm in Bellefield Hall! (Sorry, had to pitch it! :))
1. Pour enough oil into your pan to make it just less than 1/2 inch deep. Turn on the heat to medium-high heat to let the oil heat up.
2. Take your biscuits out of the can and separate them. Does opening these cans scare anyone else, too?? Put your melted butter in one bowl and mix your cinnamon and sugar in another.
3. Using a small round cookie cutter or plastic bottle cap (don’t judge us for using a wine bottle cap), cut out the center of each biscuit. Keep the holes though – of course you’re going to fry those up, too!


4. To test if the oil is hot enough, add a single hole to the pan and it should sizzle and bubble around the edges. The hole should turn nice and golden-brown within a minute or so if the oil is hot enough.
5. Carefully add the donuts to the hot oil (ours fit in one pan). They fry up fast so the first one should be close to flipping by the time you add the last donut. You want to flip them once they turn pretty and golden-brown.

6. Once all the donuts are flipped, the first should be about done. Remove them all to a plate as they finish browning. Fry up the holes now!
7. Once everything is fried, dip one at a time in the melted butter, then in the cinnamon sugar mixture.
8. Serve and enjoy!

-D&E

So not to simply post everything that’s popular on Pinterest, but this recipe deserves the attention – Pioneer Woman’s Cinnamon Toast. We never knew we were making cinnamon toast the wrong way our whole lives!!! Pioneer Woman is truly an American hero for opening up our eyes to the real way to make this – so thank you!

Obviously this is supposed to be a breakfast recipe, but we decided to try it out late Monday night. We normally read together every night before bed (you probably either find this cute or weird) and our latest read has been the entire Chronicles of Narnia series. We’re about halfway through – on Book 4: Prince Caspian. Erica grew up on the books so it’s fun to read them together now, 15 years later! Anyway, we wanted a snack and figured what’s better than delicious cinnamon toast late at night? Nothing, except maybe some of Declan’s mom’s cake.
You probably have all of the these ingredients already – so do yourself a favor and make this right now. For whatever meal you happen to be needing: breakfast, lunch, dinner, or snack!

1. Preheat your oven (or toaster oven!) to 350F.
2. If you need to soften your butter, microwave it for 10-15 seconds but make sure it’s not melty. We used about 1/2 stick (4 tbls) for 5 pieces of bread.
3. Add your cinnamon, sugar, and vanilla (start out with only a few drops) to taste. Use a fork to mash everything together until consistent.

4. Spread the butter mixture onto the pieces of bread and go out all the way to the edges so the bread won’t burn. Place the slices on a foil-lined baking sheet for easy clean-up (particularly useful late when midnight snacking).
5. Bake in the 350F oven for 10 minutes.
6. Switch the oven to broil after the 10 minutes and place the toast under the broiler for 1-2 minutes. The toast will go very fast, so don’t leave the oven now!
7. Once the top is nice and brown and bubbly, remove from oven. Slice and enjoy!

-D&E
Happy pi day! Being engineers and loving math, we think that today is a great day! But sadly, today’s recipe will not be a pie. 😦 We have yet to make one – but this will be our new goal for next year’s pi day!
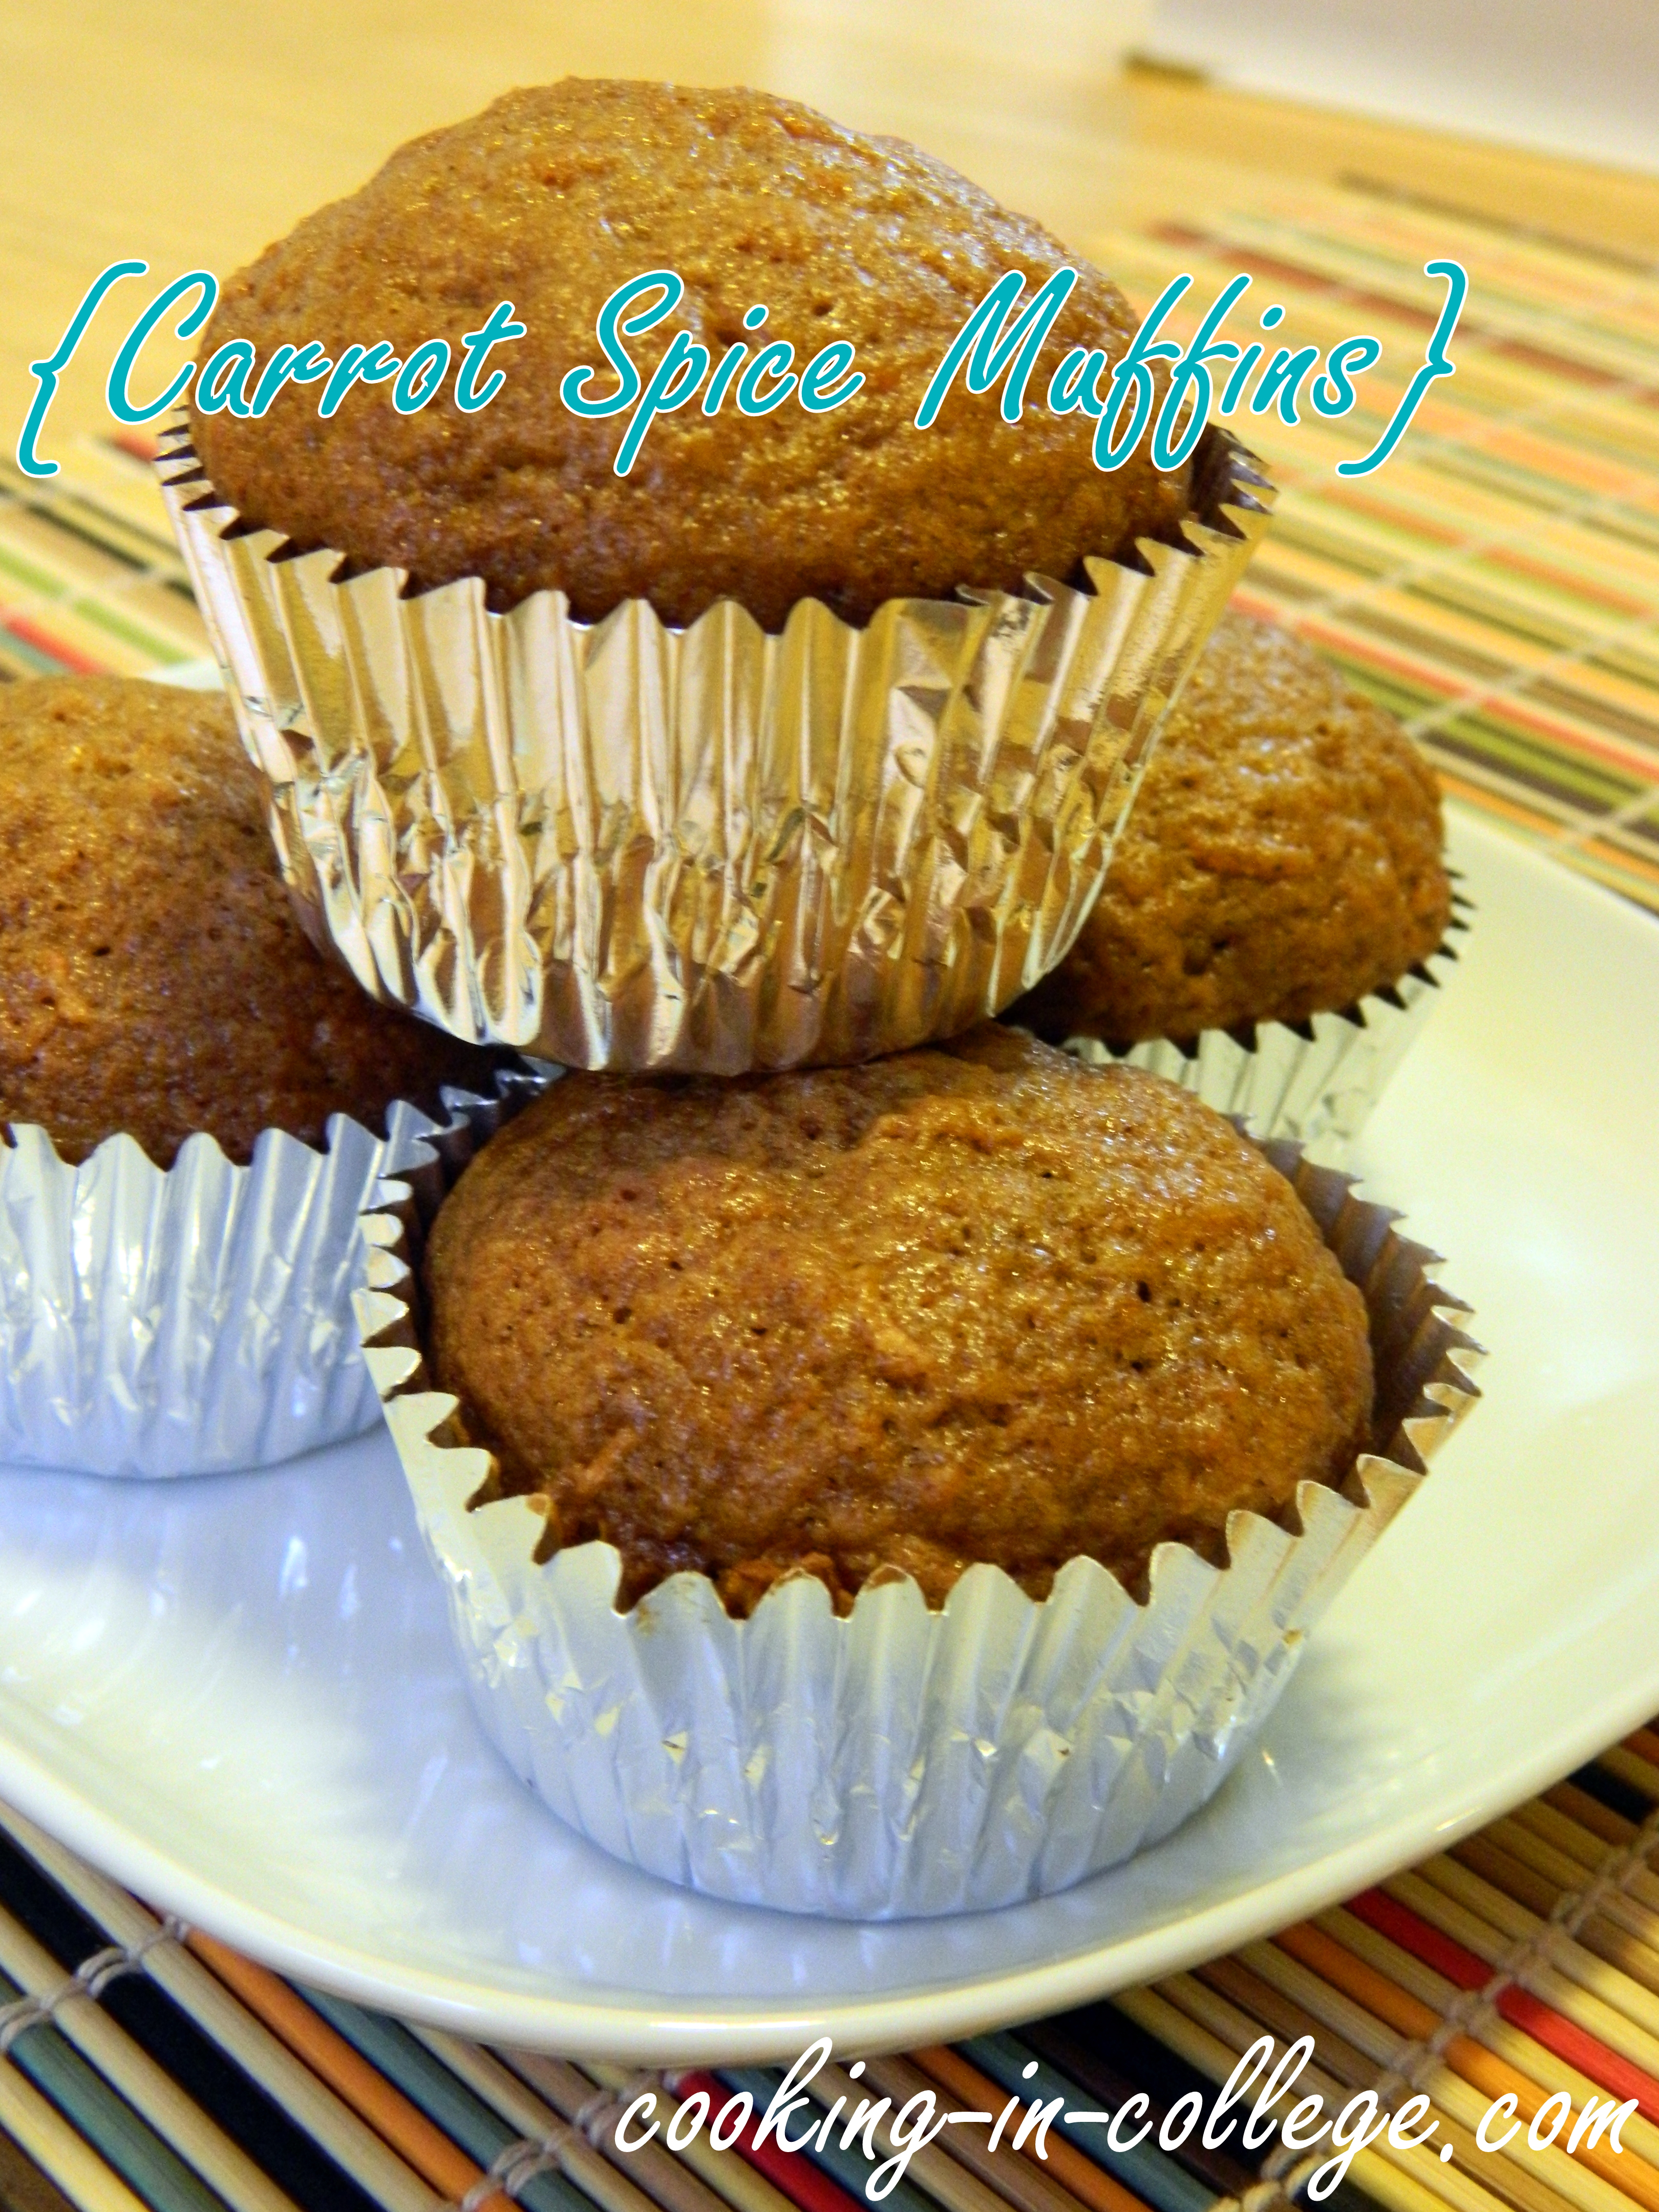
Today’s recipe does involve baking though… These muffins are really yummy and the recipe makes a dozen so you will have enough for about a week or so of breakfasts! They’re also not super sweet, which we liked for breakfast muffins (these aren’t cupcakes!), but you could always add a teensy bit more sugar to your tasting. Feel free to play around with this recipe (we’re thinking of adding zucchini next time?) and let us know how it goes!
1. Preheat oven to 350F.
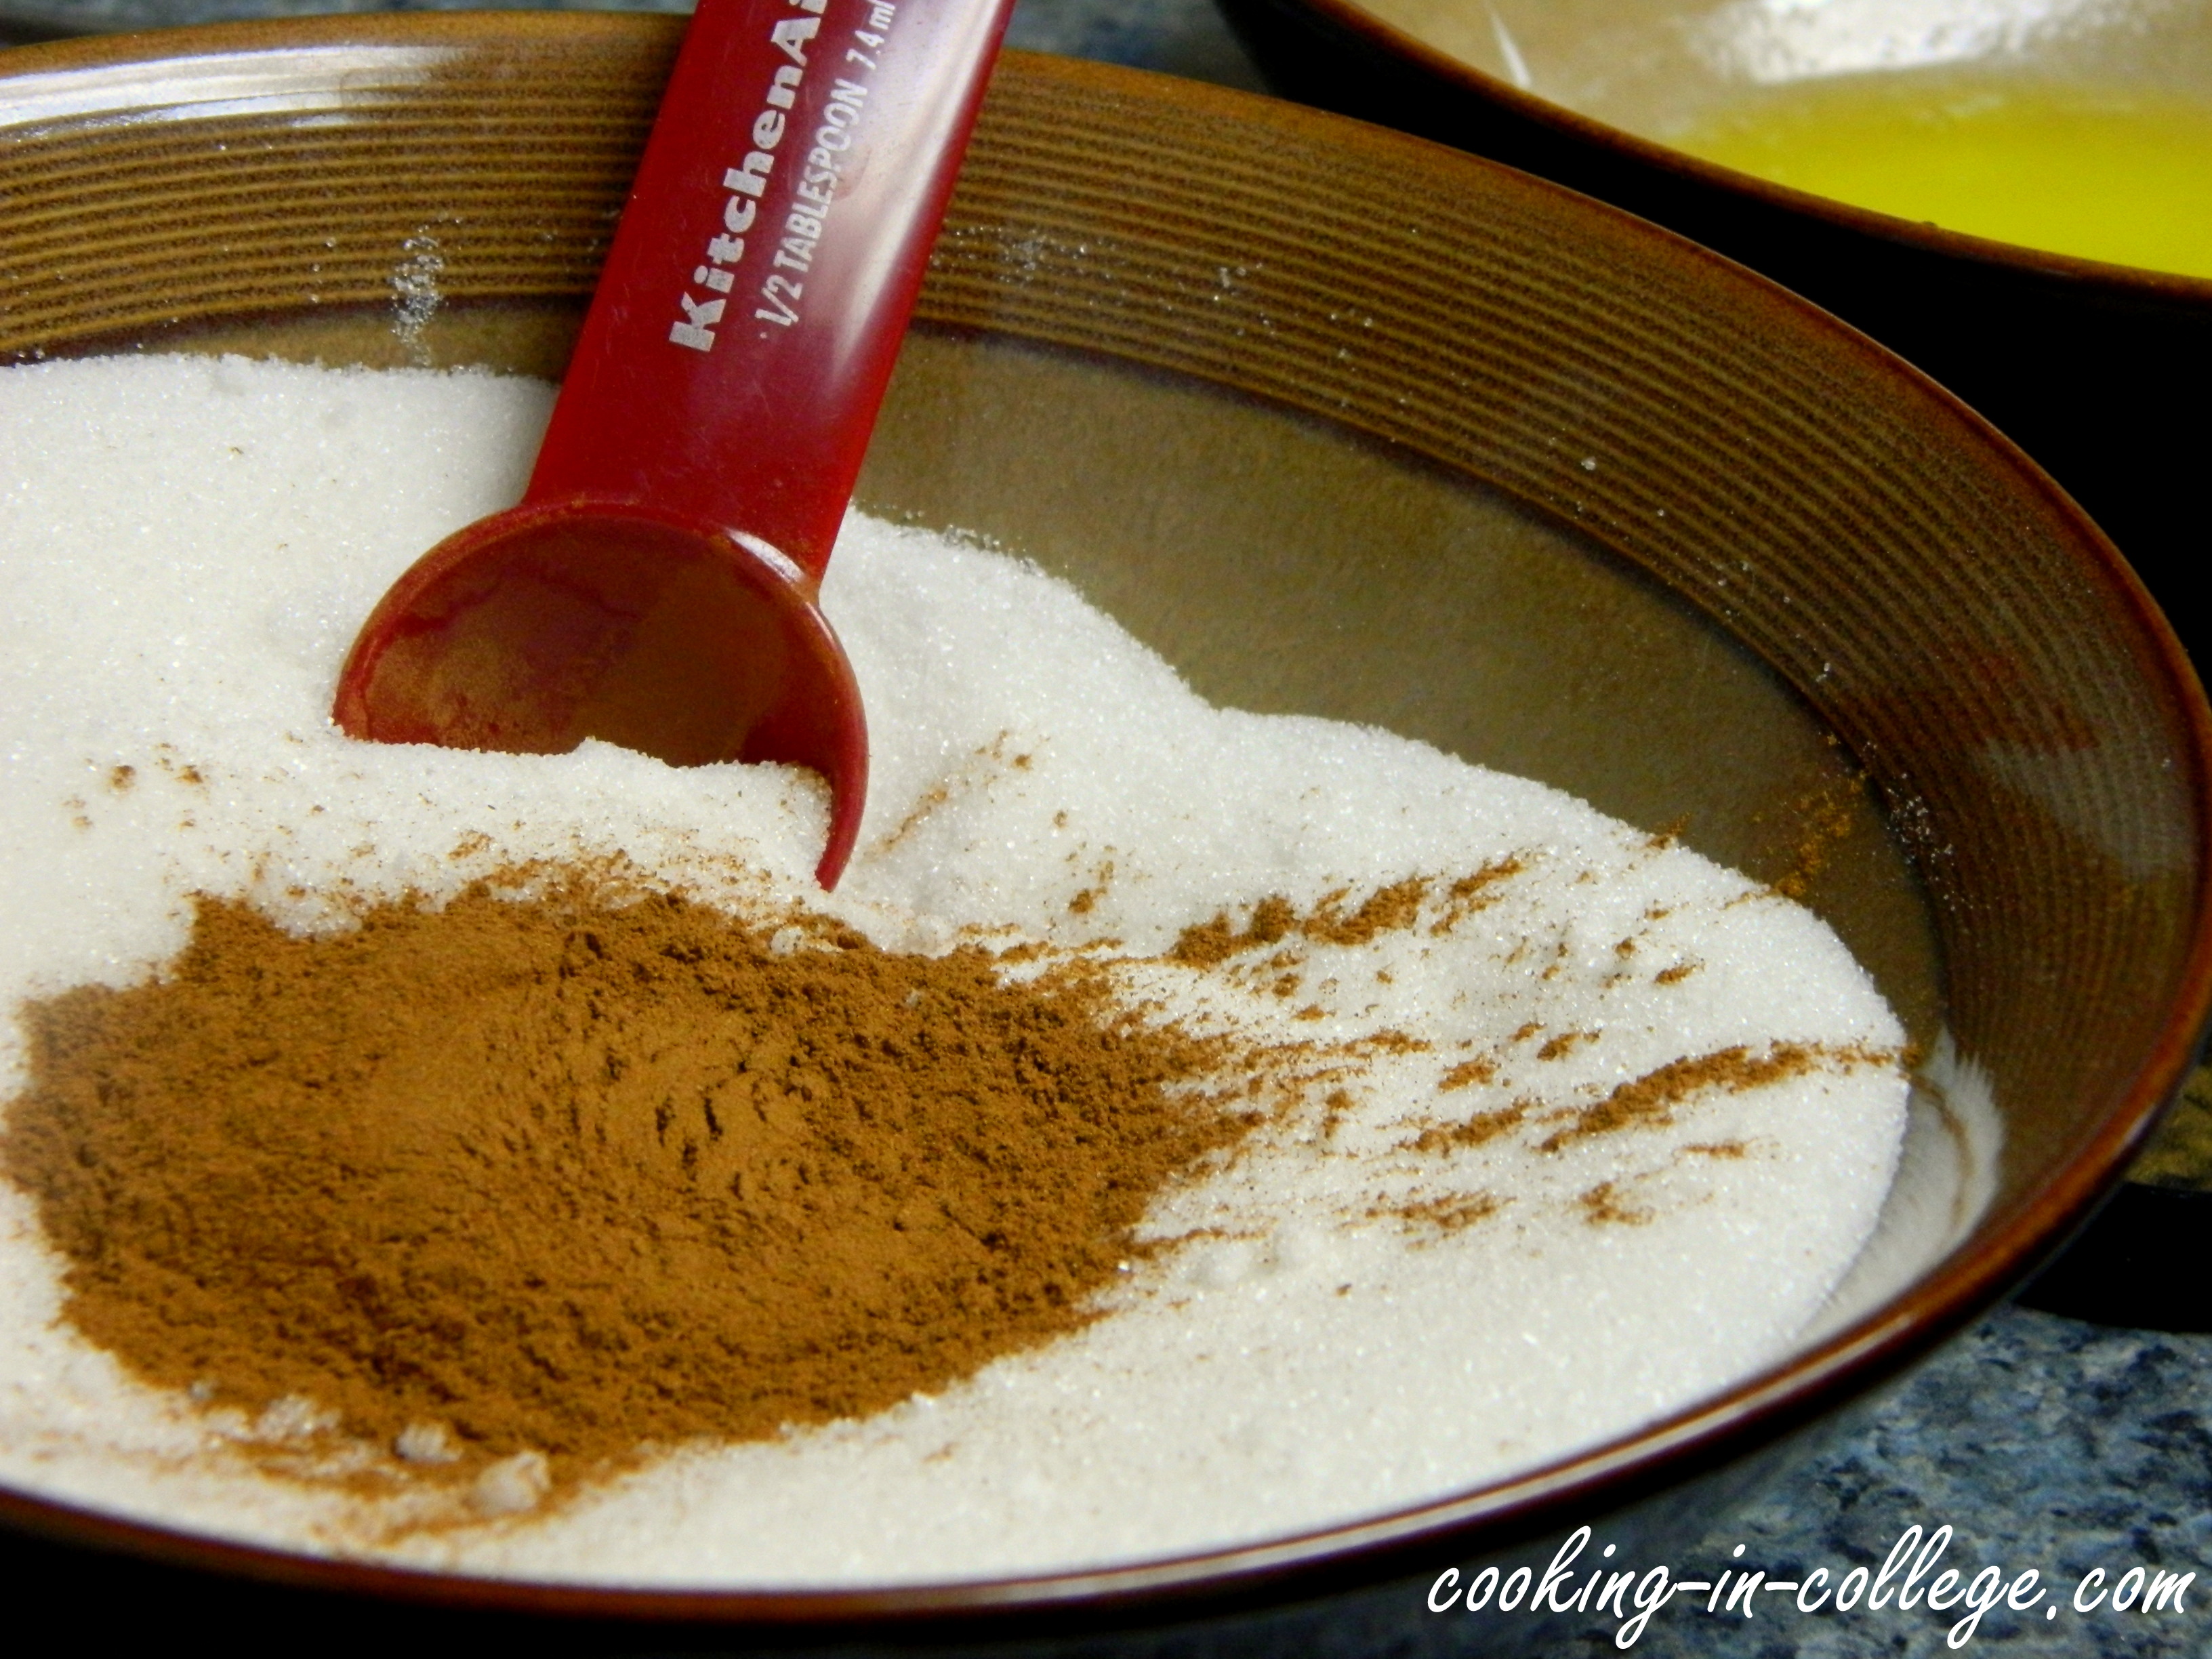
2. Combine flour, sugar, spices, baking powder, baking soda, and salt into a large bowl.
3. In a separate bowl, whisk the eggs, oil, and vanilla together.
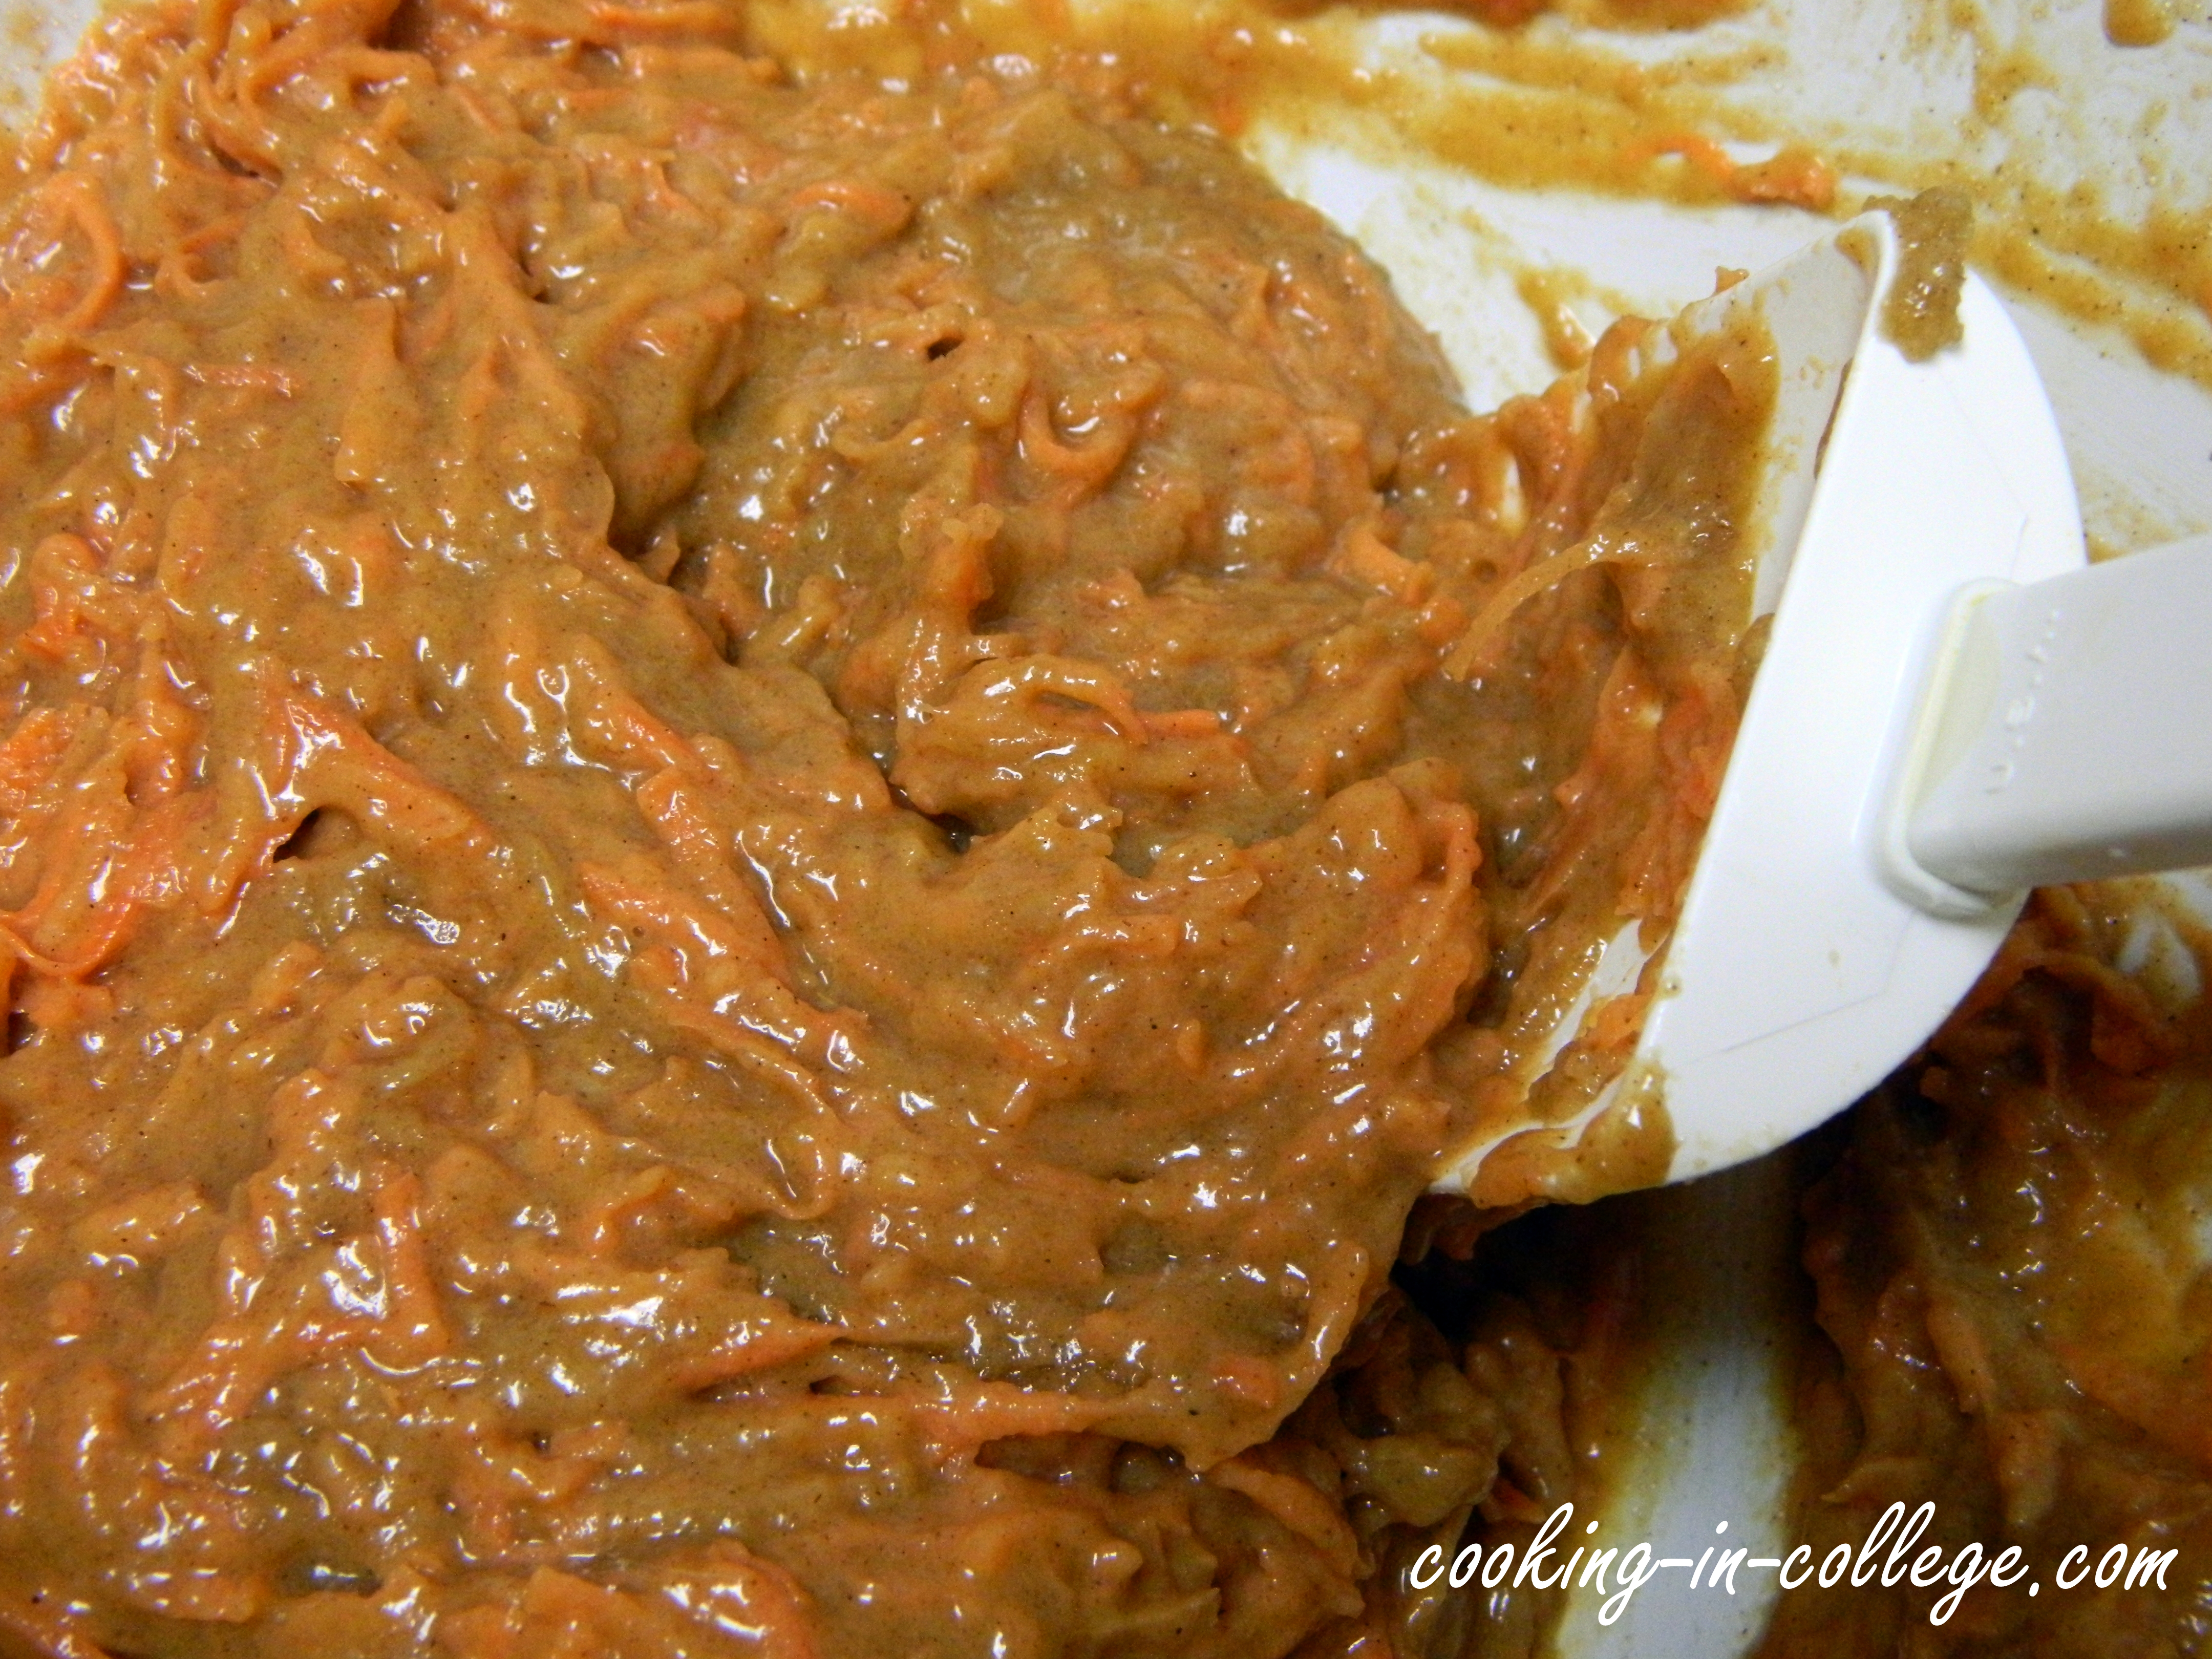
4. Add the wet mixture to the dry mixture and stir until just combined. This will seem kind of dry, but it’s okay – the carrots add a lot of moisture.
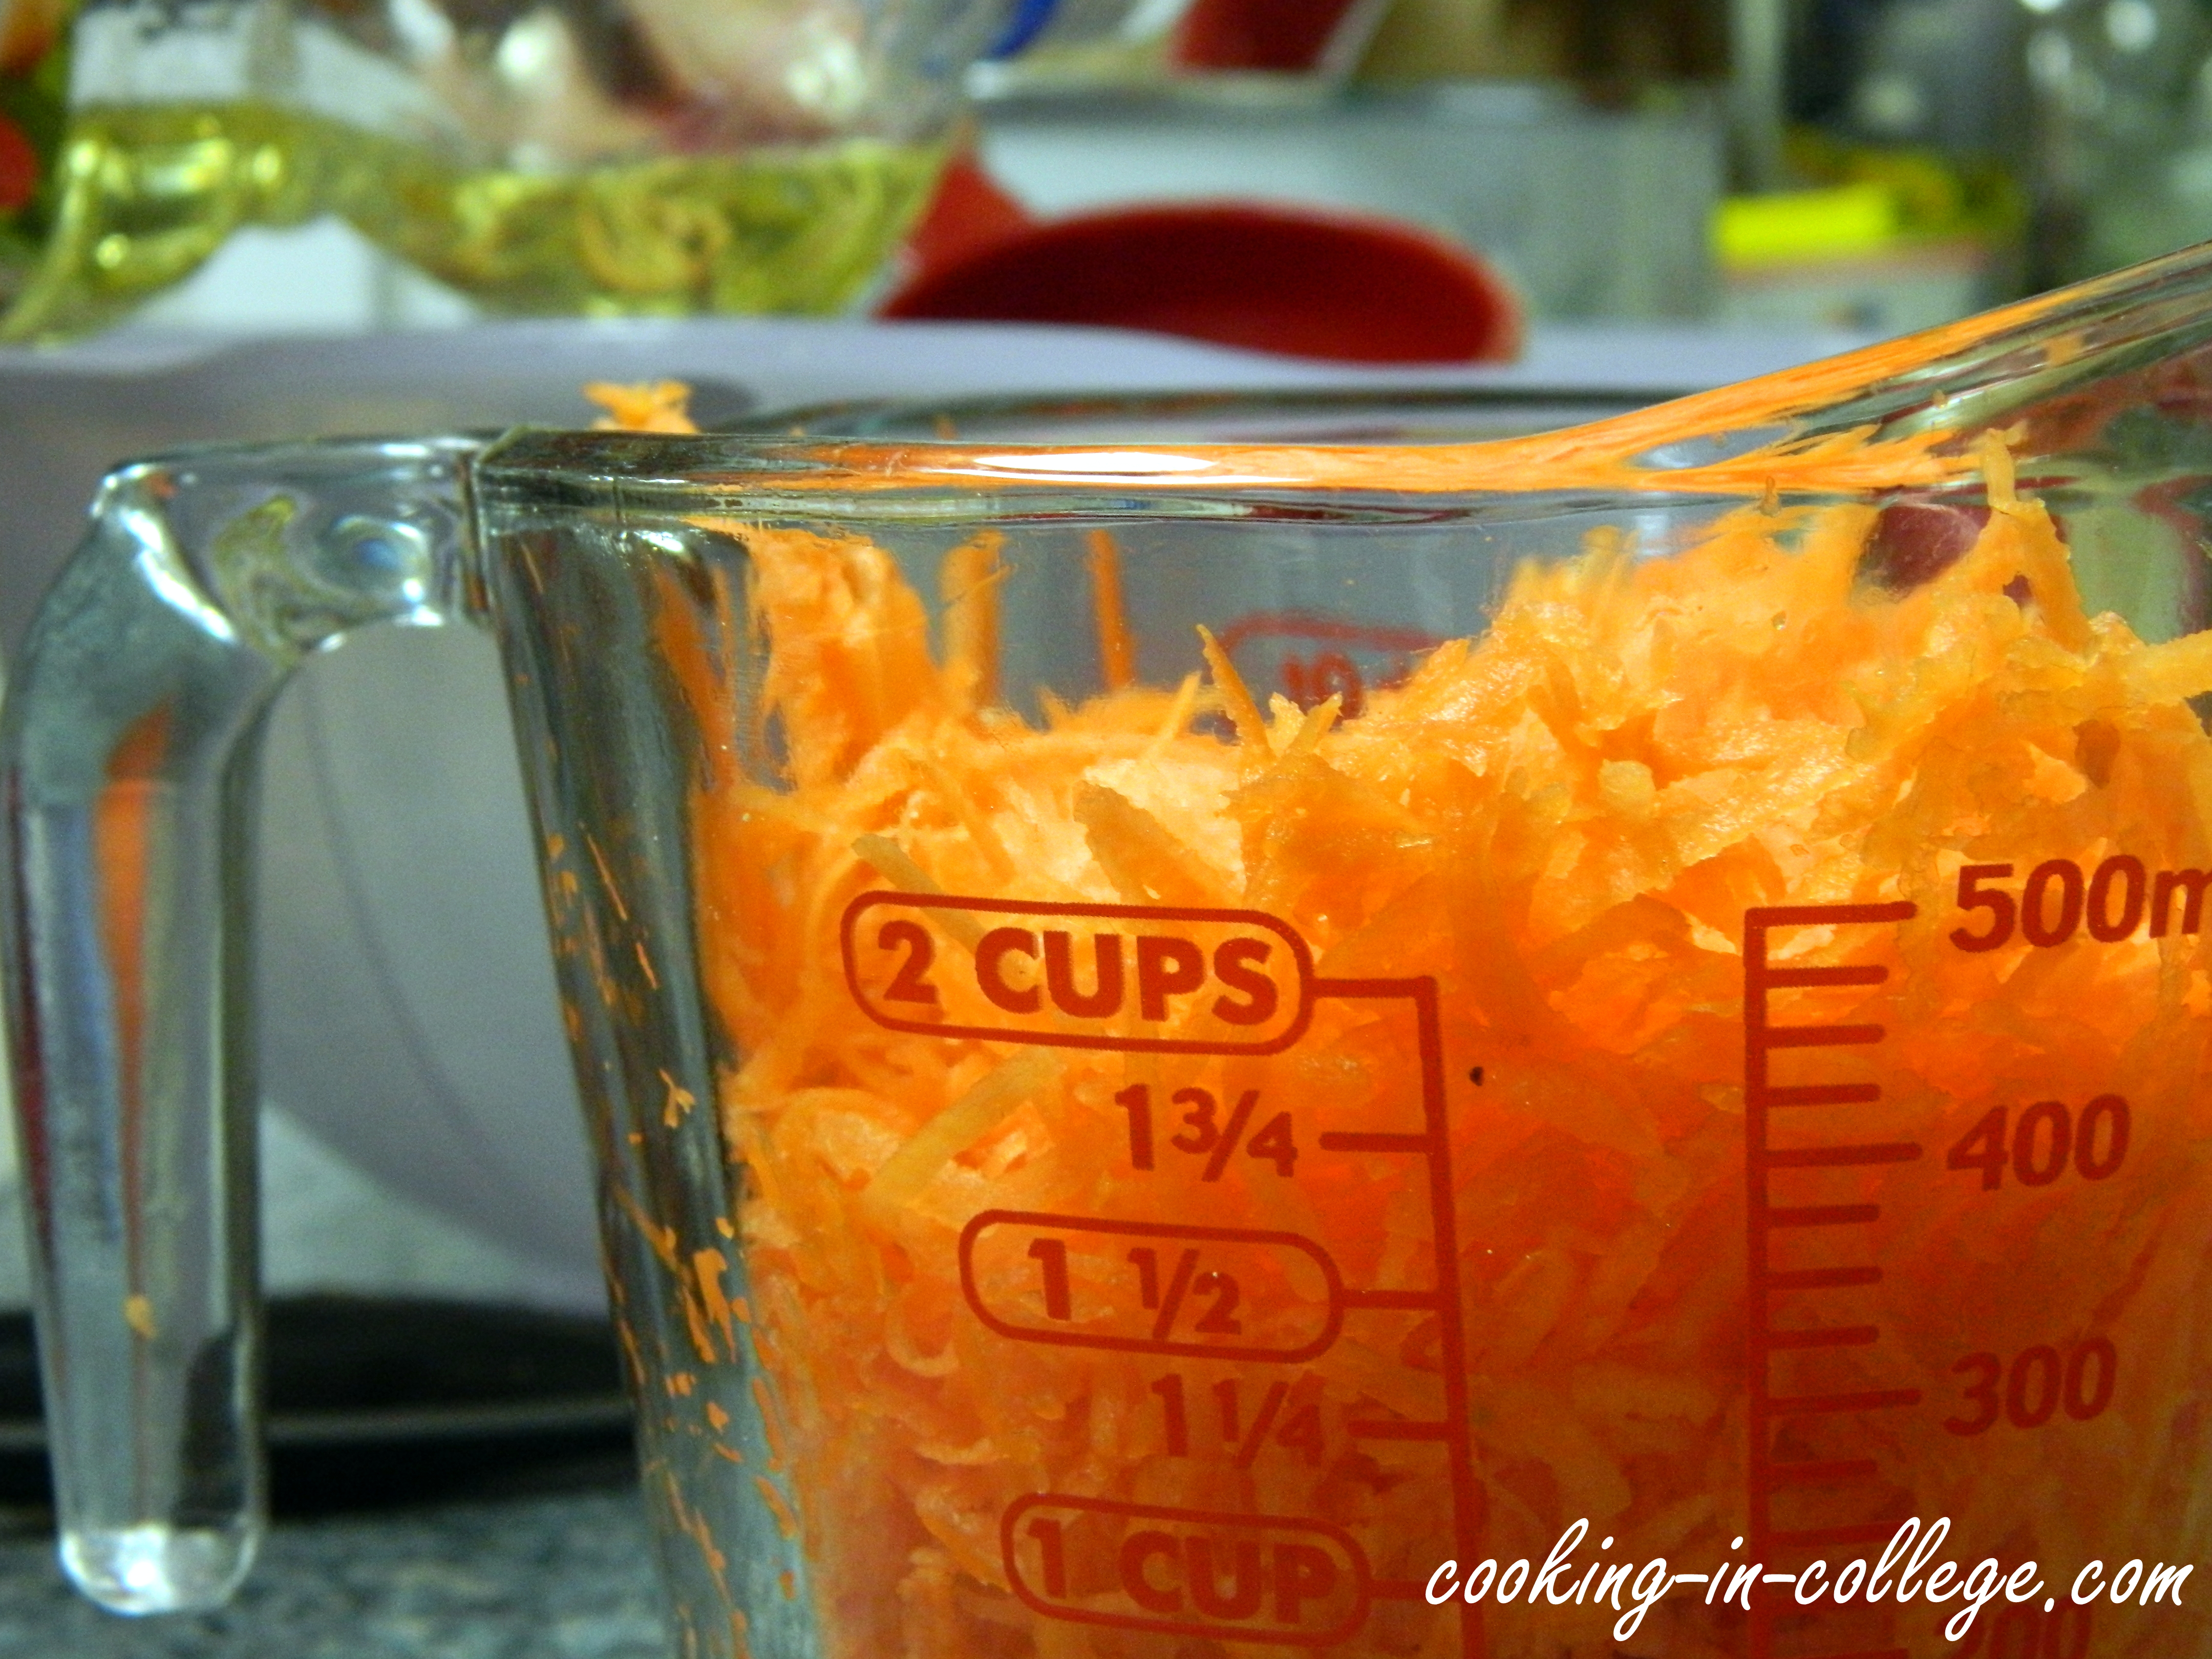
5. Add the carrots and stir until evenly distributed.

6. Divide the batter between 12 muffin cups and bake at 350 for 28-30 minutes.

7. Let them cool and store them in an airtight container. For breakfast, try microwaving them for a few seconds to warm them up! Enjoy!
-D&E
Eggs are so versatile to the average college student. They are quick and easy to make and are very nutritious. We were craving eggs early Saturday morning last weekend and decided to make eggs, but how?
Declan can make a mean scrambled egg but we’ve had that many times before. Over easy eggs are our favorite but we didn’t feel like it at the time. We Googled some other egg recipes and found the easiest one – eggs in a cup.
We forgot that we received ramekins as a wedding gift and thought we could break them out again. The prep work was a cinch and in 20 minutes time we had a delicious brunch! If you don’t have ramekins, try using some oven-safe mugs!
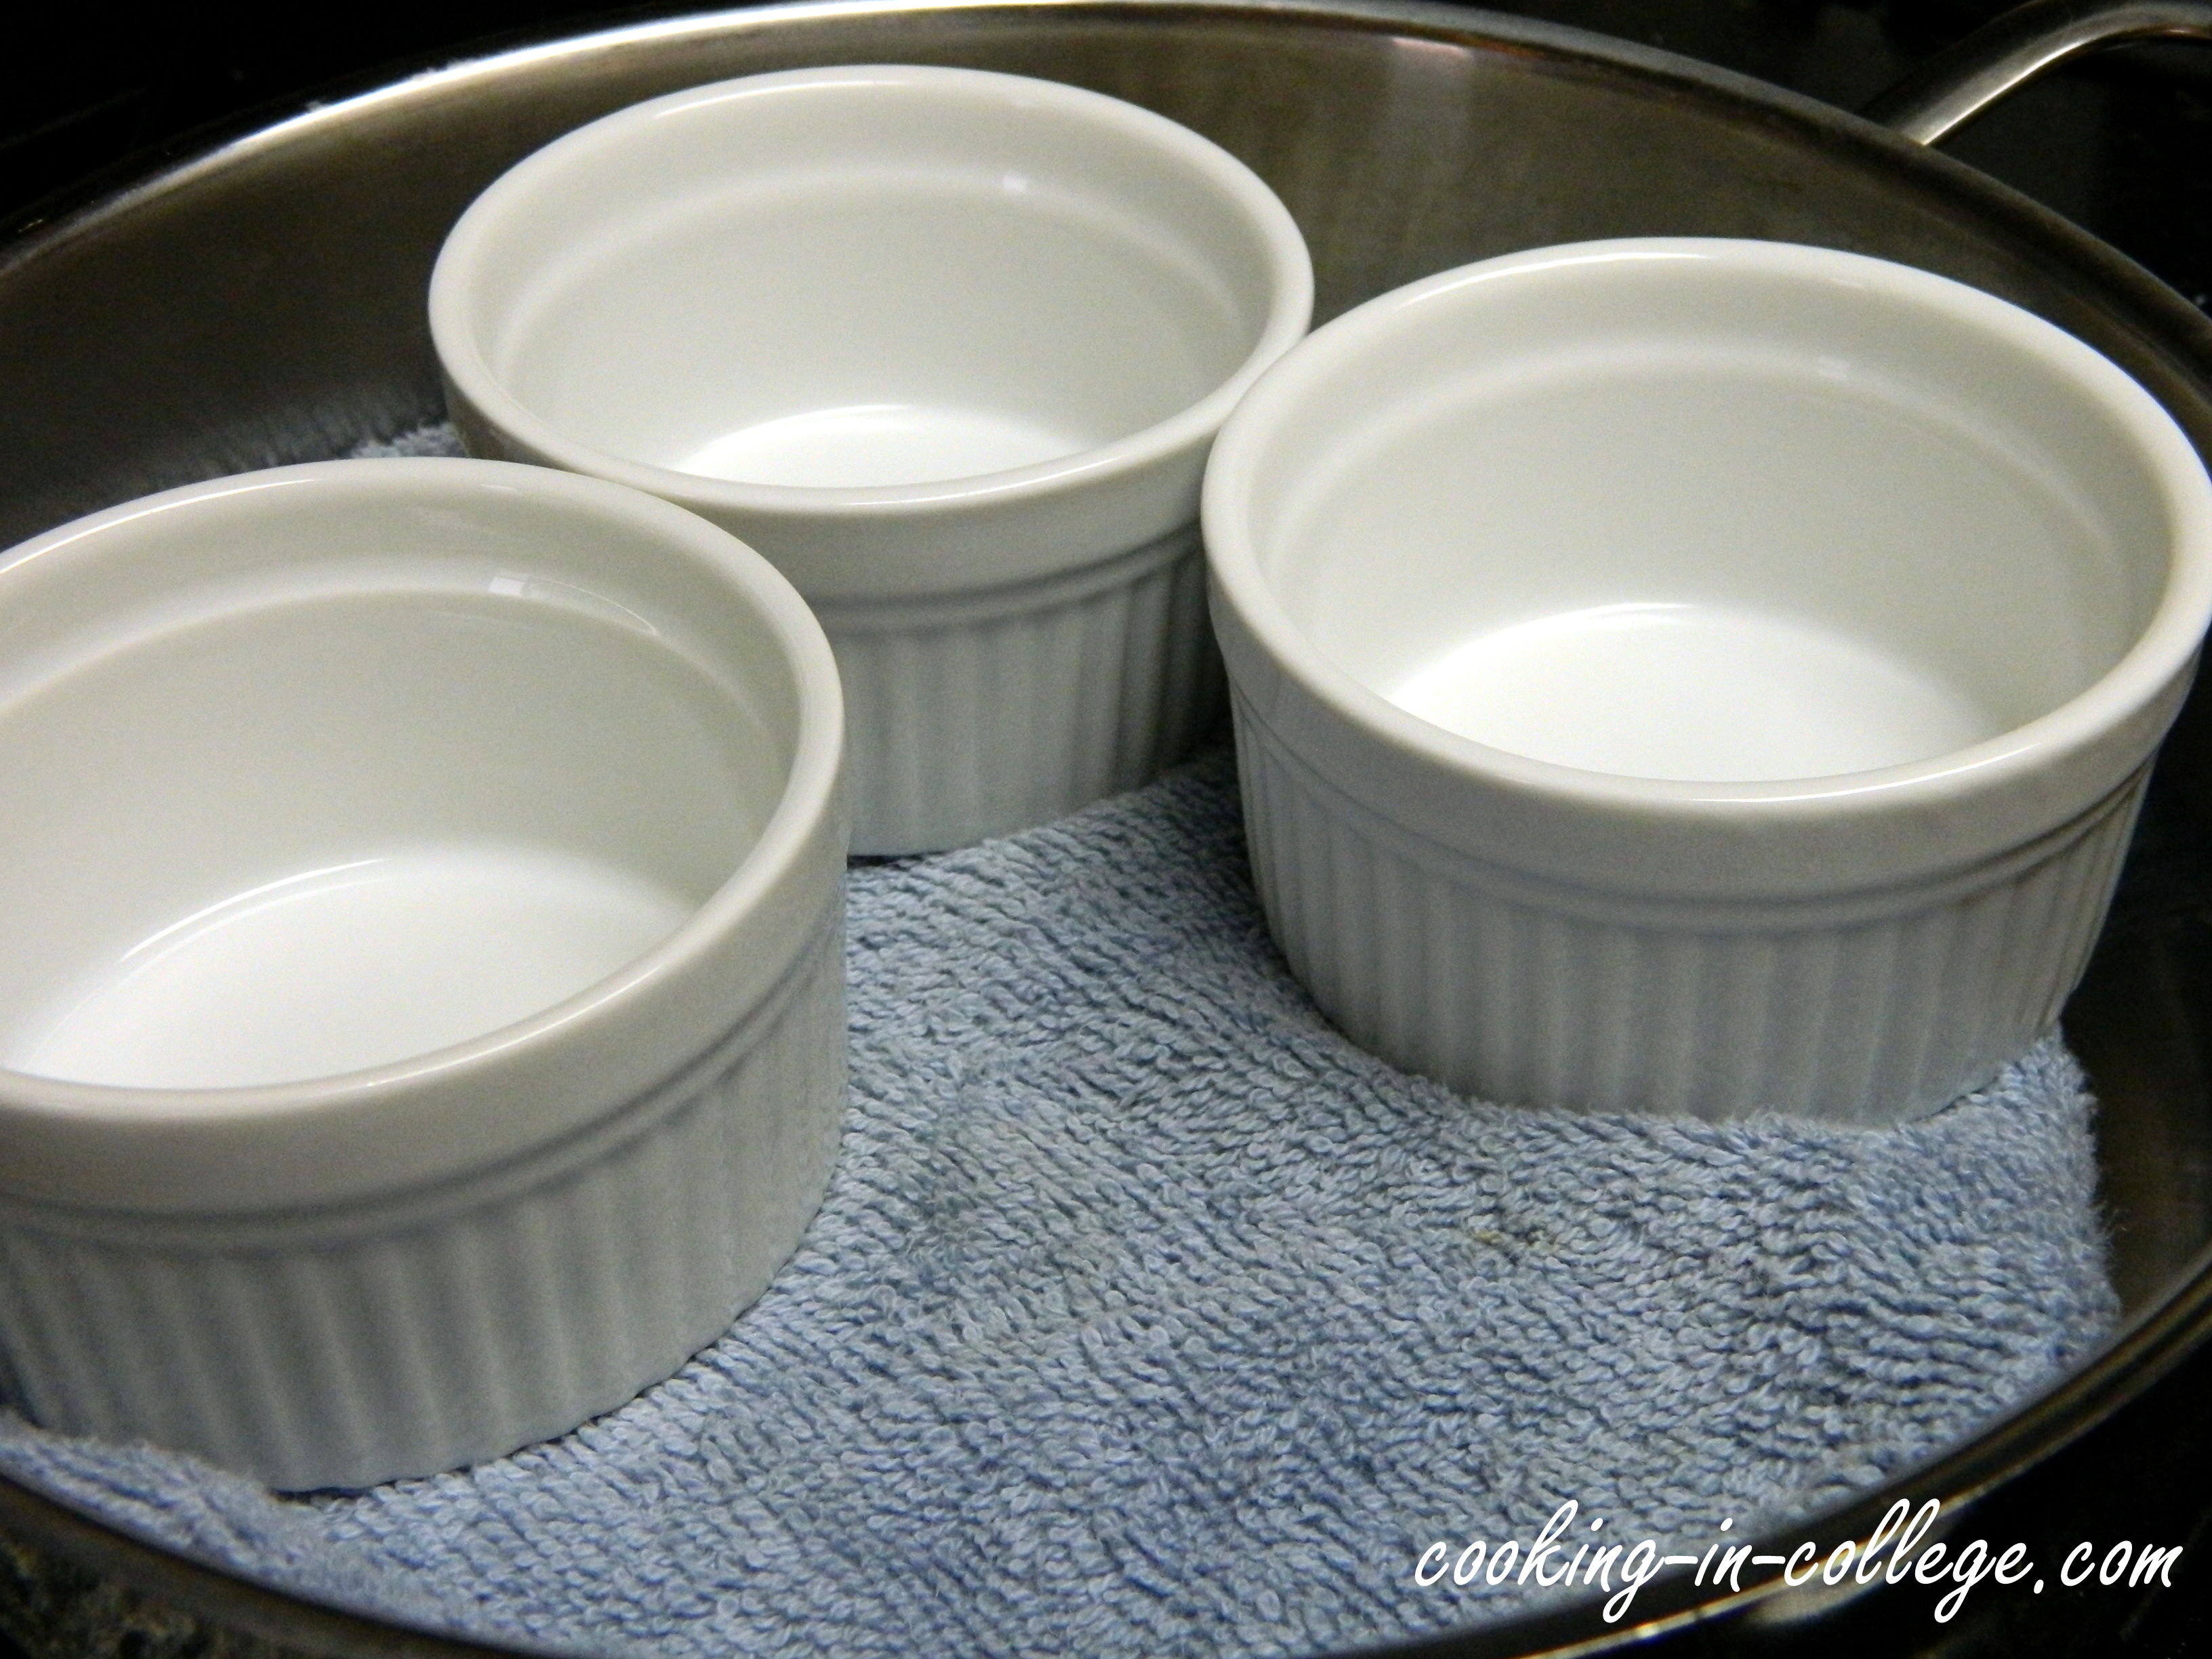
1. Take out your ramekins or small mugs and grease with olive oil or butter.
2. Lay a clean washcloth or dishtowel on the bottom of an oven safe pan. Place the ramekins in the pan (this will help keep them from sliding around).
3. Add to the cup your favorite “filler.” We used diced tomatoes and Parmesan cheese – yum! Feel free to experiment here – other veggies, sausage, anything would be good!.

4. Crack 1 or 2 eggs into each cup depending on the size of the cup. We cracked 2 since our ramekins are a bit bigger. Sprinkle with salt and pepper.

5. Pour boiling water into the pan until half of the cup is submerged in water. This helps to keep the cooking temperature consistent.
6. Bake your eggs at 375F (in a preheated oven please!) from 12 to 20 minutes until the eggs are white. Cooking time will vary depending on the size of the cup and the number of eggs in it.
7. Remove from the pan carefully with a spatula, serve, and enjoy!

-D&E
P.S. – Today is Declan’s sister Caitrin’s birthday! Happy 18th birthday Caitrin! We love you!
Well the election is finally over, at least we do not have to listen to any more political ads! But Tuesday had even better news for us – Declan was offered a full time position at the company he has been interning with for the past two years! He will be starting in January once we return from our honeymoon. We aren’t sure yet if we are allowed to disclose where he will be working but we will give you three hints:
Good luck solving that! We celebrated Tuesday evening by going out to dinner at one of our favorite restaurants, the Union Grill here in Oakland. Overall, we are just so grateful to know that we will have a steady income soon.

So we made this recipe awhile back when we had dinner at a friend’s house. They were really simple to make and turned out very well! They’re a great appetizer and easy to travel with because they can be served warm or cold! But we definitely have to credit where we got the recipe – thank you Kristin from Iowa Girl Eats!
1. Preheat oven to 350°F.
2. To separate your egg whites, carefully crack your egg in two pieces. Over a bowl, gently pour the yolk between the two pieces of shell, letting the white fall into the bowl and keeping the yolk intact. (Use this website for recipes to use up the extra two yolks!)


3. Shred your zucchini using a grater.

4. Combine all your ingredients into a large bowl and mix to combine.

5. Spoon the mixture into a well-greased mini muffin pan so each cup is full.

6. Bake for 15-20 minutes or until the edges are golden brown. Let cool for about 5 minutes before removing from the pan.
7. Serve and enjoy! These little cups refrigerate and freeze well, but good luck not eating them all!

-D&E
Okay don’t get mad at us, but this past weekend we stopped by the Carnegie Library and stumbled upon this…

Oops, sorry we meant this one…

That’s right, we wanted to find a baking cookbook with easy recipes we could try with our new Kitchen Aid stand mixer. So of course we picked the “easiest” one out – bagels. Now you might be thinking we’ve gone a little too far here for this blog (and we agree) but we haven’t posted a really challenging recipe in awhile and thought it was time.
The recipe itself is not hard, but the labor to roll the dough is, especially if you don’t have a mixer. But if you are adventurous and want to make a dozen delicious homemade bagels all for around $4, then this post if for you! Now you can still make bagels without the help of a stand mixer so don’t be discouraged. We’ve adapted the recipe for those without one. But first, here is a good tutorial on kneading dough to help you out:
 Ingredients
1. In a saucepan, boil the cubed potatoes in the water until tender (about 10 minutes). Measure out 2 cups of this water and add to a large mixing bowl. (You can discard the potatoes if you want, or make mashed potatoes like us!)
2. Once the water has cooled to a warm 110ºF, mix in the yeast and let dissolve. Set it aside until it becomes foamy (about 5 minutes).

3. Add in the oil and eggs and whisk to combine.
4. Whisk in 2 cups of the flour and salt until smooth (about 2 minutes).
5. Stir in remaining flour (5.5 more cups in about 1 cup batches) with a large wooden spoon until a soft dough is formed.
6. Scrap out the dough onto a lightly floured surface and knead the dough until smooth and elastic (about 5 to 7 minutes).

7. Form the dough into a ball and place in a well oiled bowl. Set aside in a warm draft free spot until it doubles in size (about 1 hour).

8. Punch down the dough and turn it out onto a lightly floured surface. Slice into quarters and take each quarter and cut into thirds.

9. With your fingers and palms, roll out the pieces into 10 inch long ropes, 1 inch in diameter.

10. Flatten one end and dabble just a bit of water. Bring the other end towards it to form a circle and pinch together.

11. Set aside all of the bagels on a lightly floured surface and let them rest for 15 minutes.
12. Position your oven rack in the lower third of the oven and preheat to 425ºF. Grab 2 baking sheets and line with parchment paper and lightly oil the paper.
13. Fill a large wide pot 3/4 of the way with water and bring to a boil. Once boiling, reduce heat to maintain a gentle boil.
14. Using a large slotted spoon, gently lower 3 bagels into the water and simmer for 1 minute. Flip the bagels over and simmer for another minute. Spoon out the bagels onto the parchment paper and repeat with remaining batches.

15. Brush the bagels with the beaten egg and sprinkle with seeds.
16. Bake for 25 to 30 minutes or until golden brown.
17. Cool on a wire baking rack before toasting then enjoy!

-D&E
Learning to be all God created me to be and walking daily in His grace.
simple, healthy recipes for young adults
ACE YOUR BACHELOR OF EATING WELL - EVEN ON YOUR BUSIEST DAY!
by Declan and Erica, America's Cutest Cooking College Couple
A twentysomething's mission to make better food with little time, money, and experience

You must be logged in to post a comment.