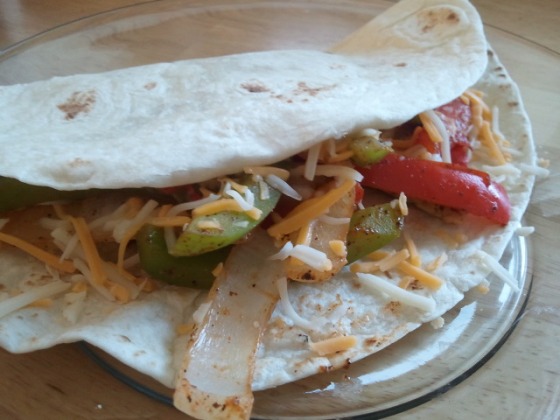
Mexican Casserole

Well, since we’ve returned from the wedding, we have been extremely busy cleaning, organizing, unpacking, and adjusting to our new routines that we haven’t had too much time to cook dinner. However, last week we were able to find an easy casserole recipe that is perfect for college students (and newlyweds). Of course it’s a Mexican casserole with all our favorite fixin’s, but you can basically throw in any mixture into this casserole to your liking!

If you have any other easy recipes send them our way to mail@cooking-in-college.com!

Mexican Casserole

Print this recipe!

Try to put as many veggies as you can into this casserole, your mom would want you to!
  • Servings – 4 to 5
  • Prep time – 5 minutes
  • Cook and Bake time – 30 minutes

Ingredients

  • 1 pound ground beef (or ground turkey)
  • 1 onion chopped
  • 1/2 bag frozen corn kernels
  • 1/2 bag frozen peas
  • 1 packet of taco seasoning
  • 1 1/2 cup shredded Mexican cheese mix
  • 1 can (8 oz) refrigerated crescent dinner rolls

Protocol

1. Pre-heat your oven to 375ºF

2. In a large pan, brown your ground beef or turkey over medium-high heat.

3. Once meat is slightly browned, add in the onion, corn, peas and taco seasoning. Continue to cook until frozen veggies are thawed.

4. Transfer the contents in the pan into a 9×13 inch baking dish and evenly spread.

5. Sprinkle about 1 cup of the cheese over the contents in the dish.

6. Unroll the crescent rolls over the contents and make sure to cover everything.

7. Sprinkle the remaining cheese over the dough and bake in the over for 15 to 20 minutes until the dough becomes golden brown and crispy.

8. Serve and enjoy!

-D&E

Guacamole

It’s actually surprised us how long it took us to finally post our guacamole recipe. As you know we love to make and consume Mexican food. And most Mexican foods require that you eat it with guacamole on the side.

Guacamole, if you don’t know, comes from an avocado which is actually a fruit. The more you know.

Before we actually begin with the recipe we are going to show you step by step by step how to get the “meat” out of the avocado.

1. Hold the avocado firmly in a mitt or an oven thingy.

2. Using a large sharp knife, cut into the avocado lengthwise until the knife hits the seed and begin to rotate the knife around the seed.

3. Pull apart. Grab a hold (still using the mitt) of the half with the seed and lightly strike the seed with the heel of the knife.

4. Twist the knife so the seed pops loose.

5. Around the non sharp side of the knife, place your thumb and pointer finger around and slowly pinch the seed until it pops off the knife.

6. Again holding the avocado half in a mitt, cut lengthwise and then crosswise to make a sort of checkered pattern.

7. Use a spoon to scoop out these little cubes of avocado meat into a bowl.

And now onto the recipe…

Guacamole

There’s nothing more we can say other than…it’s amazing.
  • Servings – 8
  • Prep time – 20 minutes
  • Cook time – None

Ingredients

  • 4 small or 3 medium-large avocados
  • 1 lime
  • 1 small onion finely chopped
  • 1 small red tomato
  • 2 tablespoons  fresh cilantro
  • 1 teaspoon dried oregano
  • 1 tablespoon cumin
  • 1/2 teaspoon cayenne pepper (You can add more or less depending on how spicy you want it. The 1/2 teaspoon just gives flavor, not really any spiciness.)
  • Salt and pepper to taste

Protocol

1. In a large bowl smash the avocado flesh with a potato smasher until a creamy yet still chunky consistency. Squeeze half of the lime juice into the bowl.

2. Finely chop the cilantro and red tomato (leave the seeds out) and add to the bowl.

3. Stir in the rest of the ingredients and cover with plastic wrap.

4. Put in the fridge for at least an hour to allow the flavors to meld. Taste and add any more of the seasonings if you want. Serve and enjoy!

-D&E

P.S. – The recipe for the burger in the picture is coming soon!

Easy Enchiladas

You might be thinking that we would be all Mexican-Maxed-Out from our trip to California. Wrong. We’re going through withdrawal. That’s why this week we just had to use the authentic corn tortillas we got (actually stole, thanks Auntie Connie!) from LA.

There really is no correct way to make enchiladas. This recipe is what we’ve found to be cheap, healthy, and really easy to make. As you can see, we use corn tortillas because, well, its the authentic thing to do. Plus they just make the dish. You can also use flour tortillas or whole wheat tortillas instead, but you just won’t get that Mexicaness out of them.

We know we’re harping about using corn tortillas because of their authenticity, but in typical D&E fashion, we contradict ourselves by using ground turkey instead of ground beef in this recipe. We’ve found that ground turkey is a perfect healthy substitute for ground beef and is actually really good. You actually don’t need any meat in this recipe, you can easily add more veggies to the mix instead.

Now onto the recipe…

Turkey Enchiladas 

A healthy alternative to the original dish but still just as tasty!
  • Servings – 9 to 12 enchiladas
  • Prep time – 5 minutes
  • Cook time – 15 minutes
  • Bake time – 20 minutes

Ingredients 

  • 1 pound ground turkey
  • 1 green pepper chopped
  • 1 medium onion chopped
  • 2 cloves garlic finely chopped
  • 1 1/2 tablespoons taco seasoning
  • 2 cups shredded Mexican cheese mix
  • 1 can re-fried beans
  • 12 ounces enchilada sauce
  • 9 to 12 corn tortillas
  • Sour cream (optional)

Protocol

1. Brown the ground turkey for 5 to 7 minutes. Since ground turkey is more “pasty” than ground beef, make sure to keep breaking it up as it browns.

2. Add 1 tablespoon of the taco seasoning and the garlic to the meat and incorporate.

3. Add the chopped onion and pepper and sauté with the meat for 2 to 3 minutes.  The vegetables shouldn’t be completely done yet – they’ll cook more in the oven.

4. Add the rest of the taco seasoning (1/2 tablespoon) to the mixture, incorporate, and turn off the heat.

5. In a small sauce pan, heat up the re-fried beans for 2 to 3 minutes. Just enough to it can be easily spread.

6. Pour and spread a thin layer of enchilada sauce over the bottom of a 9×13 inch baking dish.

7. To ensure the tortillas don’t break, zap 3 in the microwave for 15 seconds.

8. Pour 1/3 cup of the meat and veggie mixture into the middle of the tortilla.

9. Add a sprinkle of cheese on top.

10. To “glue” the enchilada together, spread beans on one half of the tortilla, fold the plain side down first, and wrap the “beaned” side over that.

11. Fit as many enchiladas together into the dish (seam side down), pour and spread the rest of the enchilada sauce over top, and finish off by sprinkling the rest of the cheese evenly.

12. Cover with aluminum foil and bake for 20 minutes at 350° F or until the cheese is melted and bubbly.

13. Serve with a bit of sour cream and/or spanish rice and enjoy! Serve to friends to impress or keep the rest for yourself for lunch and dinner the next couple days!

-D&E

(Also – just want to shout out a quick HAPPY BIRTHDAY! to Erica’s sister Tara, who is also an amazing cook and has influenced Erica a lot! 🙂 )

From a Sunny LA to a Flooded Burgh

Wow. Vacations sure do go by fast. After 10 days in beautiful sunny Los Angeles California, we are back in flooded humid Pittsburgh. But it’s okay, we’re ready to get back into the swing of things with the new school year approaching and, of course, we’re ready to get back to cooking!

Also, we had a surprise waiting for us when we got back to Pittsburgh – we have been nominated for Pittsburgh’s “Most Valuable Blogger” in Dining and Entertainment! Notice the shiny new badge on the right? Just give it a click, and vote for us on the page! It takes 1 second! Whoever nominated us, thank you for your support, we are so thrilled to be a contender with these other great blogs.

But anyway, our trip was amazing and filled with even more amazing food. We actually didn’t take that many pictures of our food because by the time we took out our camera, we had eaten all of it. Here are a few pics we did manage to capture:

Uncle Jose's homemade chorizo

Bonfire on the beach and cooking hot dogs!

We were so happy to finally eat a lot of authentic Mexican food from some awesome restaurants like Tito’s Tacos, Ortega 120, El Tarasco, El Indio and from Declan’s Mexican relatives who cooked a fantastic “farewell” dinner our last night in LA.

Taquitos at El Tarasco

Traditional Mexican carne asada, beans and rice

But we didn’t survive on Mexican food alone. We hit up Manhattan Beach’s famous The Kettle and the best fast food in America, In N Out Burger (hey we were on vacation we can eat some fast food, especially since it is all fresh!)

The Kettle's french onion soup - the best in the world!

Us at In N Out

Double-Double Animal style and fries

If you think we just ate the entire time in LA, you would be partially correct. We did spend some time hanging out at the beach and sight-seeing during our stay.

University of Pittsburgh Alum Gene Kelly at Grauman's Chinese Theater

Declan eating french onion soup

The Church from "The Graduate" (1967) - Elaine! Elaine!

All in all we had a great time visiting Declan’s family out west and hope to see them again soon. But alas, all good things must come to an end. We hope you’ve had a good past two weeks and we look forward to sharing some more recipes with you this week!

-D&E

Tacos (and these are definitely outside the box)

As you know by now we have moved into a new apartment with our good friend Mike this past weekend. We tested out the new kitchen on Tuesday night with one of our favorite meals, tacos (Mexican is our favorite, which reminds us…next week we’ll be in Cali!). We wanted to keep it simple since this was our first time in the new kitchen. This is a meal that anyone can make during the week. You can even plan ahead by chopping the onion and pepper in the morning and leaving them in the fridge during the day. They’ll still be fresh that evening as long as you put them in a good Tupperware container.

Tacos

Our recipe doesn’t call for Taco Meat Filling but rather actual ground beef. Declan and Erica 1 – Taco Bell 0. You could always buy the more expensive, leaner ground beef, but why pay the extra money when you can drain off a lot of the fat yourself?
  • Servings – 5 to 6 Tacos
  • Prep time – 5 minutes
  • Cook time – 10 minutes

Ingredients

  • 1 pound of ground beef
  • 1 medium onion chopped
  • 1 red or green pepper chopped
  • 5 to 6 flour tortillas
  • Your favorite taco seasoning (we used Penzy’s of course!)
  • 1 can refried beans*
  • Sour cream*
  • Grated cheddar cheese*

*optional

Protocol

1. In a pan over medium heat, sauté chopped onion and pepper with a little olive oil for 2 to 3 minutes or until tender.

2. Add the ground beef and brown for another 5 minutes or until no longer pink.

3. Drain off any excess fat by covering the pan with it’s lid and tipping over the sink. Just drain the majority but leave a little for the seasoning.

4. Return the pan over low heat and add your taco seasoning. Since we used Penzy’s (which is authentic as you can get) we added 3 tablespoons to the meat and veggies.

5. Heat for another minute then turn off heat.

6. If you want re-fried beans, now’s the time to make them! In a sauce pan over medium low heat, heat up re-fried beans for about 3 to 4 minutes.

7. Serve on warm flour tortillas with your favorite taco toppings and enjoy!

-D&E

Mexican Monday, Monday!

“Uhh, D&E why did you start off this week with that?!” Well, aside from our obsession of the 1960’s , it’s a hint of where we are going for vacation this summer…that’s right we’re going to CALIFORNIA! We are so excited! For one, we get to visit Declan’s family and for two we get to eat our favorite food in the world…MEXICAN!

Since our trip is still 65 days away, we just have to share our favorite meal with you, FAJITAS! No joke, this meal has been our staple for the past year… actually it’s the first meal we ever cooked together! So without further ado…

Fajitas

Extremely versatile meal that can easily exclude the chicken to become a vegetarian meal or substitute the chicken for steak (but we’re in college so…) If you haven’t bought fajita seasoning from Penzey’s yet you can always buy a small packet from your local grocery store to make sure you actually like it first.
  • Servings – 3 to 4
  • Prep time – 5 minutes
  • Cook time – 10 -15 minutes

Ingredients

  • 2 thawed boneless chicken breasts
  • Pack of flour tortillas
  • 1/2 green pepper
  • 1/2 red pepper
  • 1 small onion
  • Fajita seasoning
  • 1 can of re-fried beans*
  • Sour cream*
  • Mexican cheese*

(*optional)

Protocol

1. Cut your chicken into “french fry” like strips…or any shape you desire but the longer and slimmer they are, the faster they’ll cook.

2. Cut both peppers into long strips as well, again refer to this video for tips on cutting peppers.

3. Slice your onion into half-arcs like we did in the Balsamic Braised Chicken recipe.

4. Over medium to high heat, brown your chicken strips for 2-3 minutes a side or until evenly cooked.

5. Throw in your peppers and onion into the pan, cook until tender. Tip: add a little bit of water to the pan to give the veggies a little steam.

6. Add the fajita seasoning to your desirable amount, everything in the pan should be coated evenly. 

7. If you want to be somewhat authentic, heat up a can of re-fried beans. Refer to the instructions on the can. Oh and make sure to wear a sombrero during this step, it’s extremely important.

8. Serve with sour cream and cheese on a flour (or corn) tortilla and enjoy!

Let us know how it went!

-D&E